Showing posts with label purple. Show all posts

Sunday, March 31, 2013

Easter Nails - Pastel Stripes

Happy Easter! For today I did a fun pastel rainbow using some colours I rarely even look at any other time of the year. I didn't bother using tape to make these lines perfect, handmade Easter eggs rarely are! Well, mine aren't anyway.


Pink: Revlon Peach Petal
Yellow: China Glaze Lemon Fizz
Green: OPI Gargantuan Green Grape
Blue: Sally Hansen Insta-Dri Blue-Away
Purple: OPI Planks A Lot
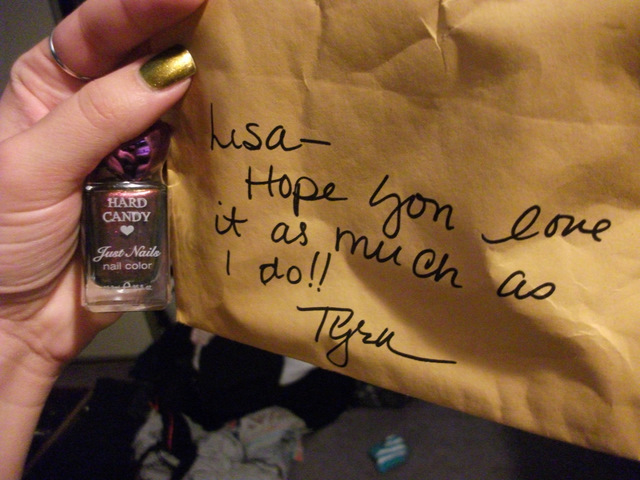
Because these shades are so light I needed three coats of each (except the Blue, but I did it anyway), which was simple enough but fairly time consuming. When looked at in the shade they really POP, it's fabulous! There's definitely a part of me that has a soft spot for rainbows. Don't tell anyone.

xox

Sunday, October 21, 2012

Hocus Pocus Series Part 2: Sarah Sanderson

This is part 2 of my Hocus Pocus Halloween manicure series. Part 1 was based on Mary Sanderson, you can see it here.

Sarah is my favourite character from Hocus Pocus. Played by Sarah Jessica Parker, this sister is fun, a bit ditzy, boy crazy and wears the sexiest dress.

Once more I took the inspiration for the manicure from the outfit she wears.


To start off I layered China Glaze I Love Hue with China Glaze Below Deck (mauve and red, like her dress) and I noticed she seemed to have a shimmery overlay on the bust of the dress, so I threw on a coat of OPI It's My Year.


After that I used striping tape and made a lace-up/criss cross/ corset design, painted over it with a miscellaneous burgundy-red that I have in my stash and presto - Sarah Sanderson manicure.


I like this manicure because it can be very versatile, especially if you're being almost any sexy female version of something - witch, fairy, pirate, vampiress, etc. It was just a huge pain in the butt to cut all the little pieces of tape so I'm  glad I got this one done on a weekend, it took longer than my normal manis.

I borrowed my Mom's camera for these photos but I don't think I'm a fan, I'll try to get some different pictures with my own later on during the week when the sun comes back out.

Part 3 will obviously by Winifred Sanderson - but that won't be coming until Wednesday or Thursday. See you then!

Wednesday, March 28, 2012

China Glaze Below Deck Gradient Tutorial

Hello again my fine feathered friends! This week I've had a string of job interviews and I happen to have an "interview polish" that brings me luck, class and an air of professionalism whenever I wear it. No joke. I had mentioned in my first interview on Monday that I occasionally blog about my nails, so for the second interview (which I had this afternoon) I wanted to spice things up a little bit.

Initially I was wearing China Glaze Below Deck, a muted sort of brownish greyish purple, and I wanted to turn it into a gradient mani. This is sometimes also called fading.


To achieve this look you need:

  • Any colour of your choice for the base, obviously in my case it was Below Deck
  • White polish
  • A shallow dish of some sort
  • A toothpick/bobby pin
  • A make up sponge
  • Top coat
  • A brush and acetone for clean up
Step 1.
Paint your nails with the base colour and allow to dry completely. I like doing this on a mani that's already a couple of days old.
Step 2.
Drop some of the coloured polish into the dish along with about 2-3 drops of white. You don't want the shade to be too far off just yet. Mix it up thoroughly. 
Step 3.
Use your make up sponge to dab some of the mixture onto your nail, starting at the tip (just in case the sponge is too saturated) and work your way to about 3/4 down. Do this to the nails on both hands so you don't have to re-mix your polish and risk not getting the same colour results.
Step 4.
Add 2-3 more drops of white to your dish and stir it up until it's well blended. Once again you're going to use your sponge  to go over every nail but you'll only be going 2/3 of the way down your nail this time around since you want to leave some of the new layer exposed.
Repeat this step two or three more times, adding more white to the mixture at the end of each round and covering less of your nail as you go along.

Step 5:
Apply your clear top coat. This is important because this sponge makes the polish look rough and bumpy, not a good look! 
Step 6:
Use your brush and acetone to clean up the edges and voila! Beautiful gradient mani.

If these instructions are in any way unclear or if you want photos of the step-by-step (or even want to see it in a different colour) please let me know. 

Later in the week I'll be trying a new formula to achieve the gradient look, I'll be sure to let you know how it goes.

Thursday, October 20, 2011

Apologies and past NOTD - Hard Candy Beetle

First off, allow me to state that I should be renaming this blog to "Lisa's Blog of Neglect" because, if you hadn't noticed, I haven't actually posted since September. To all my followers: Thank you for sticking around, I promise I will keep up to date as much as I can from here on end.

That being said, it's not as though I haven't been photographing my nails to show you (eventually), so tonight is the night where I'm going to flood the internet with past NOTDs. Expect about five posts (including this one) to trickle through as the hours pass. I would put them all in one post but I feel that separating them will not only make cataloging them a lot easier, but also finding them again will be too.

This polish comes to me with a wonderful story. I frequent a nail polish board and a lovely lady named Tyra had posted a photo of her nails sporting Beetle by Hard Candy. I love, love, love that polish and was unable to get it in Canada (ridiculous) and it was driving me batty. She messaged me saying that she was willing to go to Walmart and buy it for me, free of charge and  no expectations of me sending her something in return! Of course I absolutely had to send her something for her generosity and kindness, but if that's not good karma I don't know what is.


What a sweet lady! I didn't get the chance to photograph it at the start of wearing it, but I managed to take some pictures a few days in. Very noticeable tipwear, but I hope you'll at least get an idea of why I wanted it so badly.


This is such a spectacular multi-chrome! You've got purple, you've got gold, you've got copper, sometimes you've got some green, sometimes you've got some pink, and sometimes you've got brown. Brilliant! Absolutely brilliant. 

The world never ceases to amaze me, and on occasion it's in a good way. Thank you Tyra! 

Thursday, July 28, 2011

NOTD: OPI It's My Year

I set out looking for this little lady a couple of weeks ago, only to find her sold out at my regular spots. This is the only one from the collection that I actually wanted (it's from the Miss Universe collection) but I wanted it bad. By chance I came across a salon and found the very last bottle buried in a bin at the end of the counter. What luck! I know it's not very close, and definitely not a dupe, but this polish is helping me quash my MAC Bad Fairy lemming just a bit. It has a purple base and flashes with bronzey/gold/pink shimmer.


It went on beautifully and was supremely easy to control. I do feel like it will look a little bit better on me once my tan fades a bit, at the moment the gold flashes are blending with my skin tone a bit too much for comfort.

Wednesday, May 4, 2011

NOTD: Royal Jewels

I'm attending a gala tomorrow for an organization I volunteer for, and the event colours are red, purple and gold. Yesterday I'd applied China Glaze I Love Hue, my bottle is actually pretty old.


Black Label, ooooh.
Then I added Sally Hansen Crushed Velvet, and Orly Luxe.


They'll match perfectly!