Showing posts with label china glaze. Show all posts

Thursday, November 27, 2014

Jamberry Nail Wrap Review & China Glaze Sun of a Peach

This post is long overdue, but here I am, ready and willing to give my full report on my only experience with Jamberry Nail Wraps.

If you haven't heard of it, the concept is similar to the full coverage nail stickers (Sally Hansen, Revlon, etc.), except that these are vinyl and are applied with heat. They're said to last way longer and generally be of better quality. I got a free sample from a friend-of-a-friend, and although the concept really didn't interest me I thought I would give it a shot.

I was sent two different samples, Funky Cheetah and Pickled Paisley. I paired them with China Glaze Sun of a Peach (one of my favourite summer colours).

Funky Cheetah


Pickled Paisley

My first thought was: wow, what a pain to apply. You have to take a hair dryer and hold it up to the wrap while the vinyl heats up, then apply it to the nail with an orange stick, file it down, and heat it again. This process annoyed me enough with only two nails to do, let alone ten. I also have very sensitive hands to cold and heat, so the second round of heat was a little much for me to handle.

Once the two wraps were on though they did look incredible, I'll give them that.

Fast forward 7 days.


Now you can see here that the wraps still look like the first day I applied them, and the nail polish is quite chipped. If you were someone who didn't feel confident with polish and wanted something long lasting, and didn't want to spend $30-40 at a salon, I would recommend these wholeheartedly. They'd also be potentially great for someone who doesn't want to risk ruining their nails while waiting for them to dry.

That being said, If you're someone like me who loves changing her polish every 3-4 days, and doesn't mind actually painting her own nails, I would pass on these. At $15 each I can't really see it being affordable for me, and it's way beyond the effort I'm willing to put in. At least with regular nail polish I can be at my computer or watching TV while I apply. The nail wraps are limiting because the dryer is loud and it's a pretty involved process.

So there you have it, they look excellent and they're durable, but they just aren't suitable for someone like me.

Tuesday, June 18, 2013

Nautical Nina

This is a post dedicated to my friend Jenny (Nenny). Last week she asked me to do a kiwi inspired mani and (in my opinion) it failed miserably. I still wanted to do something reminiscent of her, so I decided to finally follow through with the nautical theme I'd been thinking of trying. Nautical fashion always makes me think of her, and she always calls me Nina so it made it easy to bring things full circle.

Anyway, here is my take on a nautical themed manicure, for Jenny.
 

I used Finger Paints Paper Mache  (thank you Nail Board for the rec), American Apparel Passport, China Glaze Hey Sailor and Orly Luxe.

Phone pic

This was supposed to last me until the end of the week, but one of my nails broke all the way down to the nail bed, so I cut them all down and repainted them. Oh well!

This is for you Nenny!

Wednesday, June 12, 2013

China Glaze Deviantly Daring

I bought this polish recently on a whim. I was at Sally's getting myself a new white and a nail buffer when I saw a promotion where I could receive a ridge filling base coat if I purchase two China Glaze polishes. I'm almost always lemming a handful of polishes that I don't NEED but have been eyeing, so I took this as an opportunity to grab a couple. I picked it up along with Swing Baby (my current pedi, ugh I'm in love) despite having plenty of variations of it, or ways of recreating it through layering.

Anyway, after that little ramble, I quite like it! It's a foily turquoise duochrome that lends greener in some light and bluer in others. I found that in natural light it seemed more blue, and in fluorescent lights at work you could see more of the green.

 The application was just lovely, the pictures below are two coats.

Fluorescent lighting

Natural light, indirect sunlight

Fluorescent lighting

Natural light, indirect sunlight

Natural light, indirect sunlight
It's quite lovely and I'm happy to have picked it up. Now the problem will be choosing which of my many shimmery blue/turquoise polishes to use.

Sunday, March 31, 2013

Easter Nails - Pastel Stripes

Happy Easter! For today I did a fun pastel rainbow using some colours I rarely even look at any other time of the year. I didn't bother using tape to make these lines perfect, handmade Easter eggs rarely are! Well, mine aren't anyway.


Pink: Revlon Peach Petal
Yellow: China Glaze Lemon Fizz
Green: OPI Gargantuan Green Grape
Blue: Sally Hansen Insta-Dri Blue-Away
Purple: OPI Planks A Lot

Because these shades are so light I needed three coats of each (except the Blue, but I did it anyway), which was simple enough but fairly time consuming. When looked at in the shade they really POP, it's fabulous! There's definitely a part of me that has a soft spot for rainbows. Don't tell anyone.

xox

Thursday, December 13, 2012

Christmas Holly

Although I haven't been posting this holiday season, I assure you my nails have been festive. I'm growing increasingly aggravated with my camera and I find photographing my manicures quite frustrating... so I haven't been wanting to attempt it. This one coming up is actually from my phone. Sorry for the negativity but I'm trying! :)

I used Orly Luxe, American Apparel and China Glaze With Love!


Merry Christmas!!!

Thursday, November 22, 2012

OPI Stranger Tides & China Glaze For Audrey

Here we have another phone camera shot. This was taken sometime early summer (maybe late spring) and was honestly one of my favourite manis of the summer. It was just so beachy, it reminded me of sand and the sky. I was really feeling softer colours and pastels for a few months there, which I normally find incredibly boring so I assume that's part of why I didn't bother blogging any of it.


I like that they're alternating but that the difference between the two colours isn't overly dramatic. Creme finishes are by far my favourite so overall this mani was a 100% clear winner in my books.

Saturday, November 3, 2012

China Glaze Champagne Kisses over Orly Powder Puff

With all the Halloween excitement I really needed a soft, gentle, palate cleansing nail polish. It's almost like I needed a bit of a breather from all the  high-octane manicure I've been doing lately. I wanted something simple and unassuming, so I reached for Orly Powder Puff. Normally this isn't a colour I would wear, but this summer I was really enjoying soft, muted tones.

I stopped in at Sally Beauty and Trade Secrets and grabbed some holiday polish. The first on my list was from the China Glaze Holiday Joy collection: Champagne Kisses. It's a clear polish with mall rose-gold glitter. I figured even though it was sparkly it wasn't too flashy and would look pretty over Powder Puff!

In direct sunlight
This is three coats of Powder Puff and one coat of Champagne Kisses.


I love this one. The shimmer is so delicate.


In the shade
This is definitely a switch from what I'd been posting lately and I really needed it! Enjoy your Saturday everyone :)


Sunday, October 21, 2012

Hocus Pocus Series Part 2: Sarah Sanderson

This is part 2 of my Hocus Pocus Halloween manicure series. Part 1 was based on Mary Sanderson, you can see it here.

Sarah is my favourite character from Hocus Pocus. Played by Sarah Jessica Parker, this sister is fun, a bit ditzy, boy crazy and wears the sexiest dress.

Once more I took the inspiration for the manicure from the outfit she wears.


To start off I layered China Glaze I Love Hue with China Glaze Below Deck (mauve and red, like her dress) and I noticed she seemed to have a shimmery overlay on the bust of the dress, so I threw on a coat of OPI It's My Year.


After that I used striping tape and made a lace-up/criss cross/ corset design, painted over it with a miscellaneous burgundy-red that I have in my stash and presto - Sarah Sanderson manicure.


I like this manicure because it can be very versatile, especially if you're being almost any sexy female version of something - witch, fairy, pirate, vampiress, etc. It was just a huge pain in the butt to cut all the little pieces of tape so I'm  glad I got this one done on a weekend, it took longer than my normal manis.

I borrowed my Mom's camera for these photos but I don't think I'm a fan, I'll try to get some different pictures with my own later on during the week when the sun comes back out.

Part 3 will obviously by Winifred Sanderson - but that won't be coming until Wednesday or Thursday. See you then!

Friday, October 19, 2012

Hocus Pocus Series Part 1: Mary Sanderson

Any child growing up in North America in the 90's knows that Hocus Pocus is the greatest Halloween movie ever made. Just in case you were living under a rock, it's about 3 witch sisters who attempt to live forever by sucking the souls out of children and can only do so once they're brought back to life on Halloween. The witches were played by Bette Midler, Sarah Jessica Parker and Kathy Najimy.


My darling friend Ali inspired me to to a 3-part series, one manicure based on each of the witches! I'm starting with my least favourite of the 3 and working my way up.

This one represents Mary Sanderson. Bumbling Mary always seemed to get the short end of the stick and that's not really going to change here.

Mary Sanderson, Winifred (Winnie) Sanderson, Sarah Sanderson
As you can see from the photo above Mary wears a red dress with various shades so I wanted to base my manicures on that.


I used 4 different reds here: OPI I'm Suzi & I'm A Chocoholic, Borghese Sonata Berry, OPI Double Decker Red, China Glaze Hey Sailor.


I wanted to create a fabric-y look with different shades of red, so while layering them I didn't wait until they were dry. I dragged the brushes of each colour through the wet polish to achieve this streaky look.


I wasn't too worried about the polish mixing, I definitely got some on the brush but since they're all similar shades I didn't mind that they would mix a little.

So what do you think? I wanted this to reflect how velvet looks depending on the angle you're looking.

I can't wait to do the other two!

Wednesday, October 3, 2012

Autumn Acid Wash

Hello ladies (and the occasional gent), I'm bringing you another fall/autumn manicure inspired by (obviously) the changing leaves at this glorious time of year. I used a technique that I saw on Pinterest that was called "acid washing." It's a very fun, grungy approach to fall manicures.

Basically you layer multiple colours, using whatever your heart desires - but the more contrast the better, and it's recommended to use a dark colour either on the bottom, on the top or both. You then dip a paint brush in acetone and drag it down your nail, exposing some of the colours beneath the surface. 

This is the tutorial I used. I had a hard time the first few attempts, I ended up taking off way too much polish and exposing the bare nail underneath. It definitely took some time to get a handle on this one.


Polish used: Joe Fresh Pumpkin, China Glaze Hey Sailor, Sally Hansen Mellow Yellow, American Apparel MacArthur Park  and American Apparel Raccoon.
Hm! Almost the same colours as my Autumn Water Marble!

I'm kind of on a posting roll here, excellent! A shout out to Dominique, my co-worker's sister - thanks for sharing my blog on your facebook page. She's an excellent photographer, you should check out her website - www.3stems.com.

Monday, September 24, 2012

Autumn Manicures

Hello lovelies! I have a batch of manicures to show you. I've been a little sidetracked since I started my new job (which is going fabulously, by the way), but it means that I don't have a ton of daylight to photograph my nails with, nor do I have the time to do anything exciting very often. I don't want to bore you with regular ol' nail polish so I've gathered three of my more creative numbers as of late.


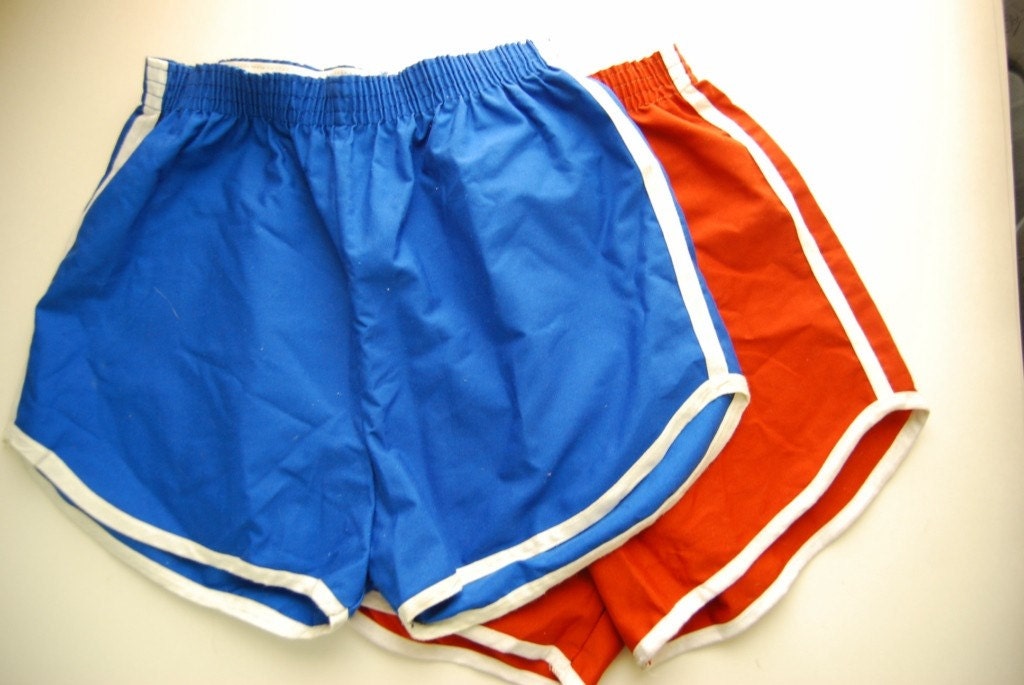
Voici my "Retro Stripe" mani, inspired by striped gym shorts from the 1970s. This was after two days of camping, forgive the tip wear.

Like these.
I used American Apparel Raccoon as the base because it dries really fast so it was easy to put the tape over it. From there I used Konad White, an orange from Aldo (I'm having a brainfart on the name, I'll get it ASAP ** EDIT - It's called Juicy Gossip) and Double Decker Red from OPI.

I wanted to use OPI Heeere's Tawny but it wasn't drying fast enough and I was pulling it off with the tape! Ugh.


This is what I like to call "Harvest," lame. It's a gradient of OPI The "It" Colour, China Glaze Lemon Fizz and Sally Hansen White On. I was inspired by a photo of wheat - so sue me, I love this season!

Finally - my current manicure. The colours were chosen by my boyfriend, believe it or not. He got all excited about it so I figured I would give him the credit.

Natural light

With flash

Right hand, with flash

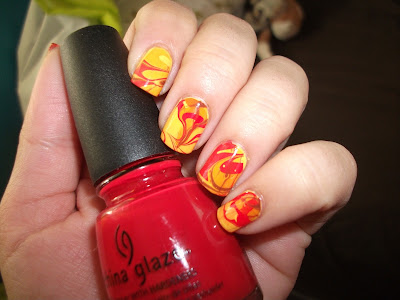
Water marble! This is a fabulous blend of - Sally Hansen Mellow Yellow as the base, Joe Fresh Pumpkin, China Glaze Hey Sailor, OPI Heeere's Tawny, and the elusive Aldo orange previously mentioned (** EDIT - It's called Juicy Gossip). I'm in love with this one, it reminds me of the changing leaves.

So - who's still with me? Sorry for the hiatus guys! I'll try to keep things up, I swear. Take care everyone.

Wednesday, March 28, 2012

China Glaze Below Deck Gradient Tutorial

Hello again my fine feathered friends! This week I've had a string of job interviews and I happen to have an "interview polish" that brings me luck, class and an air of professionalism whenever I wear it. No joke. I had mentioned in my first interview on Monday that I occasionally blog about my nails, so for the second interview (which I had this afternoon) I wanted to spice things up a little bit.

Initially I was wearing China Glaze Below Deck, a muted sort of brownish greyish purple, and I wanted to turn it into a gradient mani. This is sometimes also called fading.


To achieve this look you need:

  • Any colour of your choice for the base, obviously in my case it was Below Deck
  • White polish
  • A shallow dish of some sort
  • A toothpick/bobby pin
  • A make up sponge
  • Top coat
  • A brush and acetone for clean up
Step 1.
Paint your nails with the base colour and allow to dry completely. I like doing this on a mani that's already a couple of days old.
Step 2.
Drop some of the coloured polish into the dish along with about 2-3 drops of white. You don't want the shade to be too far off just yet. Mix it up thoroughly. 
Step 3.
Use your make up sponge to dab some of the mixture onto your nail, starting at the tip (just in case the sponge is too saturated) and work your way to about 3/4 down. Do this to the nails on both hands so you don't have to re-mix your polish and risk not getting the same colour results.
Step 4.
Add 2-3 more drops of white to your dish and stir it up until it's well blended. Once again you're going to use your sponge  to go over every nail but you'll only be going 2/3 of the way down your nail this time around since you want to leave some of the new layer exposed.
Repeat this step two or three more times, adding more white to the mixture at the end of each round and covering less of your nail as you go along.

Step 5:
Apply your clear top coat. This is important because this sponge makes the polish look rough and bumpy, not a good look! 
Step 6:
Use your brush and acetone to clean up the edges and voila! Beautiful gradient mani.

If these instructions are in any way unclear or if you want photos of the step-by-step (or even want to see it in a different colour) please let me know. 

Later in the week I'll be trying a new formula to achieve the gradient look, I'll be sure to let you know how it goes.

Thursday, October 20, 2011

Past NOTD: China Glaze Fairy Dust

Right off the bat, I'm going to admit that I thought I would hate this more than anything I've ever worn. Fairy Dust is a clear polish with teeny, tiny holographic glitter. I don't really like it as a layering polish, which is what it's intended to be, so I thought I'd give it a shot on naked nails and thought to myself "who would want to wear a sheer polish like this? I mean, what's the point?"

It was stunning. The subtle hint of little sparkles frequently caught my eye and I found myself totally enamoured with this look. It was elegant but youthful and not "in-your-face" by any means.

Click me!

The only downside to this polish is the obvious fact that, being sheer, any staining or dirt under the nails is visible. Other than that I absolutely LOVED this! Thoughts?

Monday, August 29, 2011

NOTD: Pride Nails with Black Shatter

Yesterday was Ottawa's Pride parade! I didn't get a chance to actually go, but I did help a local organization prep beforehand by... body painting the parade participants! How much fun is that?
I did this mani the night before (Saturday night) and I've gotta tell you, it's a lot more difficult when you're downing something stronger than your average grape juice ;)

I accomplished this look by applying a base coat of white as undies, then layering the neons into a rainbow so they just slightly overlap and blend. I'm a little disappointed that the pink turned more red/orange, but I've gotten a bazillion compliments on them so I guess it's no harm done.

I originally wanted to do an animal print on top instead of the shatter but the rainbow didn't blend as nicely as I'd hoped and the shatter covered more imperfections. Forgive the quality of the clean-up in this photo, intoxication leads to sloppiness. My lesson has been learned. :P


Kinda neat huh? Reminds me a lot of this mani I did a few months ago.

The colours I used were China Glaze Rose Among Thorns, China Glaze Sun Worshipper, China Glaze  Celtic Sun, Claire's Lime Yours, Claire's Marine Blue and OPI Black Shatter.

Tuesday, August 23, 2011

NOTD: China Glaze Refresh Mint & For Audrey Fade

Hooray, two posts in one day! These two colours are among my favourite to match up together. They're nice and bright without being overpowering and they're in the same relative colour family, not to mention have the same finish and very similar formula. I've been wanting to experiment more and more with nail art-esque manicures so that I won't get bored of them as quickly so to slow down my polish change rate due to time constraints I've been experiencing lately.

This effect was accomplished simply by dabbing For Audrey onto the Refresh Mint base colour with a makeup sponge. Easy peasy!


The goal is to make it last until the weekend. Think I can do it?

Sunday, August 14, 2011

NOTD: Twinkly Tigress

Oh my gosh, long time no post! It's been a busy last few weeks for me, and I've been spending a lot of quality time with DBF so I haven't had the opportunity to get on the computer much.

This being the case, I've come back with something good. After all the curiosity surrounding Sally Hansen's fall shade, Pumpkin Spice, I had to give my China Glaze Ick-A-Body a shot before I made the final decision to pick it up (the SH).

I must say, it was a bit of an experience for me. The polish itself was fine, but I had my first real run-in with shrinkage. This occurs when a quick-dry top coat pulls your polish away from the tip of the nail. I was shocked! I'd encountered very minimal occasions where it's happened, but this time around it was serious business. After wearing it for a day or two it was starting to drive me a bit batty, but as I was going to remove it I decided to experiment a little bit first - I wanted to practice tiger stripes.

I always try to attempt new nail art on manis that are on their way out so that if I don't like it, I was prepared to take it off without feeling like I've wasted time or polish. Turns out, I loved the end result! I kept it on for a day longer than intended but the glitter started to peel off. Anyhow, here it is!


What do you think??

I'm still on the fence on whether I'm going to pick up the Sally Hansen. We'll see what the upcoming weeks bring!

Monday, July 25, 2011

NOTD: Agate Water Marble

I haven't posted any of my water marbles yet, as I'm pretty sure the only good one I've ever done was my first, and I haven't bothered trying to do one since February... so here goes! 


I tried a bunch of different methods with this and screwed a up a few (I actually had to start two nails over completely from scratch) but this is the end result. I really like them! It took about an hour and a half to do it all (re-dos included). I used American Apparel's Cotton for the base, then the other colours are American Apparel Raccoon, China Glaze For Audrey and OPI Greenwich Village.

Wednesday, July 20, 2011

NOTD: China Glaze For Audrey

What a classic. This polish is the one that sparked my renewed interest in polish when I saw it on Ali's pretty little fingers. Naturally I had to pick it up. It was among my first China Glaze purchases and I wear it every now and again, but I've never gotten a good photo of it.

Alas - the timeless beauty.

Holding my bottle of Uluru Shower Gel!
This colour reminds me of kitchen appliances in the 1950s. I just love it, end of story.

Monday, July 18, 2011

NOTD: China Glaze Rose Among Thorns

I got this bad boy in a swap with Ali and I do not regret it one bit. It's bold, bright and perfect for my skin. If it was too orange it would have clashed horribly with my tone (I can only wear Sun Worshipper on my toes) but this pulls much more on the pink side.

I used 4 coats, no underwear. There's still a VNL (visible nail line) which is driving me a little mad, so next time around .. undies it is!


Cameras have a way of gobbling up all the neon wonder of a polish, so I took another picture that made my skin look atrocious, but it kind of points out the intensity of the colour.


I really need a kick ass camera. Nonetheless, this polish simply screams my name and I adore it. <3

Tuesday, June 21, 2011

NOTD: Freedom Foamer

At work we're doing a campaign that features a very green, glittery, limited edition bubble bar that is just stunning to look at. SO: I whipped up a Freedom Foamer mani in its honour!

Freedom Foamer Bubble Bar - $5.95


I used China Glaze Four Leaf Clover as the base, Claire's Glam micro glitter, and Sinful Colors Nail Junkie glitter on top of that. I'll try to get a pic of me holding the bar at work so you see how nicely they match because, once again, my camera isn't portraying how green the polish really is.