
Turns out my life is a little chaotic right now to actually blog, but I had some free time this afternoon so I decided to check back in. My nail polish obsession is continuing to grow and evolve into quite the hobby, and I'm finding myself starting to experiment with variations of a regular old manicure.
The one I've been playing with this week is called a Newsprint manicure. The first one I did I used only text and it turned out beautifully.
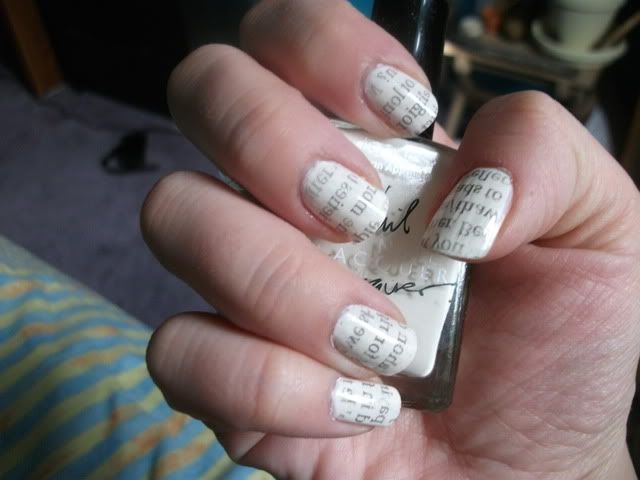
The base colour is American Apparel's "Cotton". This was a great choice for this mani because it really contrasted the lettering from the newspaper .
Following this I decided to try things out with a variety of newspaper cut outs, including: advertisements, crosswords, photos of people's faces, comic strips, etc. I found that I had a difficult time with any images with a lot of grey and little contrast. It was hard to get definition from the print. However, I was surprised when some colour lifted from the paper onto the nail! I wish I had used a lighter polish to actually see this a little bit better.
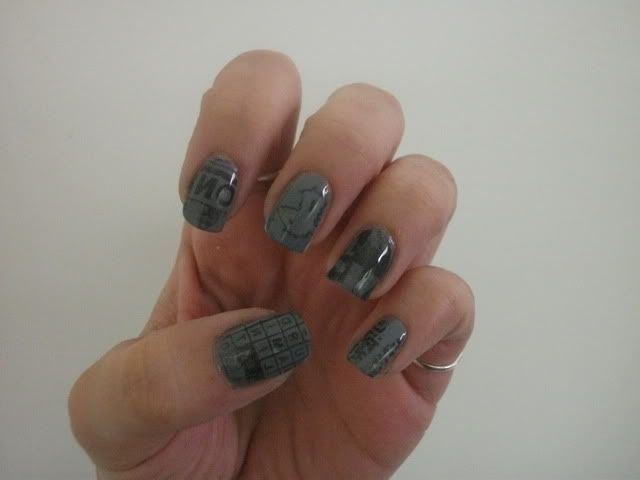 | |||
| You can see some blue and peach on my middle finger from the comic strip |
For that manicure my base colour was Rimmel's Grey Matter.
Things you will need:
Base coat
Light shade of nail polish
Newspaper
Scissors
Rubbing alcohol
Shot glass/small cup
Top Coat
- Cut out strips from the newspaper, slightly larger than your nail. Choose sections/images that have high contrast, anything with too much grey won't turn out nicely.
- Pour rubbing alcohol into shot glass, set aside.
- Apply your base coat and your polish and wait for it to dry completely. Don't use drying drops, as you will still be applying your top coat later on.
- Dip your thumb nail into the alcohol and wait 10 seconds. You want to make sure the nail is completely saturated.
- Apply a strip of newspaper on your nail face down and press firmly for 5 seconds. Make sure you are covering the entire surface.
- Once you peel the paper back the image will be printed on your nail! Repeat with your other nails.
- Apply your topcoat only once you've finished all your nails. Try not to rub the print before applying it because it could rub right off! You absolutely need a topcoat for this manicure.
Tip: Apply the topcoat generously! I dropped it onto my nail in dollops and simply guided it across to cover all the print. If your brush touches the ink or you don't have enough polish on there you could smudge your work (see my thumb nail in the first photo). - Wait for your topcoat to dry completely and voila! You're done!
This is actually one of the coolest things I've ever seen!
ReplyDeleteWee thanks!! I had a ton of fun doing it.
ReplyDelete