Showing posts with label stripes. Show all posts

Tuesday, June 18, 2013

Nautical Nina

This is a post dedicated to my friend Jenny (Nenny). Last week she asked me to do a kiwi inspired mani and (in my opinion) it failed miserably. I still wanted to do something reminiscent of her, so I decided to finally follow through with the nautical theme I'd been thinking of trying. Nautical fashion always makes me think of her, and she always calls me Nina so it made it easy to bring things full circle.

Anyway, here is my take on a nautical themed manicure, for Jenny.
 

I used Finger Paints Paper Mache  (thank you Nail Board for the rec), American Apparel Passport, China Glaze Hey Sailor and Orly Luxe.

Phone pic

This was supposed to last me until the end of the week, but one of my nails broke all the way down to the nail bed, so I cut them all down and repainted them. Oh well!

This is for you Nenny!

Sunday, March 31, 2013

Easter Nails - Pastel Stripes

Happy Easter! For today I did a fun pastel rainbow using some colours I rarely even look at any other time of the year. I didn't bother using tape to make these lines perfect, handmade Easter eggs rarely are! Well, mine aren't anyway.


Pink: Revlon Peach Petal
Yellow: China Glaze Lemon Fizz
Green: OPI Gargantuan Green Grape
Blue: Sally Hansen Insta-Dri Blue-Away
Purple: OPI Planks A Lot

Because these shades are so light I needed three coats of each (except the Blue, but I did it anyway), which was simple enough but fairly time consuming. When looked at in the shade they really POP, it's fabulous! There's definitely a part of me that has a soft spot for rainbows. Don't tell anyone.

xox

Saturday, October 27, 2012

Hocus Pocus Series Part 3: Winifred Sanderson

This is actually the second version of this manicure, and not at all what I had originally planned. Alas, the first one was a mess so I decided to re-do it today. I am now sporting a sort of funky french. My index finger turned out the best. The sun wasn't shining so the photos are not as crisp as they could be.


Winifred's dress is purple (though in the movie it mostly looks blue), green and has gold embellishments.


I thought this was going to be my favourite of them all but it really didn't turn out the way I wanted it to. I don't have a steady hand so it's hard to get straight freehand lines.


I used Rimmel Black Satin, NFU Oh 56, Kleancolor Blue Eyed Girl and So Easy Stripe Rite gold glitter.

Four years ago for Halloween my best friend and I went dressed up as Winifred and Sarah Sanderson. It was hands down the best costume I've had to-date.


Hmm. I guess we went a little sexier than the characters in the movie.


So there you have it! This was a fun way to pass some manicure time, and I have a couple more up my sleeve before Halloween.


Glamour shot. P.S. I'm actually posing with my costume!

Sunday, October 21, 2012

Hocus Pocus Series Part 2: Sarah Sanderson

This is part 2 of my Hocus Pocus Halloween manicure series. Part 1 was based on Mary Sanderson, you can see it here.

Sarah is my favourite character from Hocus Pocus. Played by Sarah Jessica Parker, this sister is fun, a bit ditzy, boy crazy and wears the sexiest dress.

Once more I took the inspiration for the manicure from the outfit she wears.


To start off I layered China Glaze I Love Hue with China Glaze Below Deck (mauve and red, like her dress) and I noticed she seemed to have a shimmery overlay on the bust of the dress, so I threw on a coat of OPI It's My Year.


After that I used striping tape and made a lace-up/criss cross/ corset design, painted over it with a miscellaneous burgundy-red that I have in my stash and presto - Sarah Sanderson manicure.


I like this manicure because it can be very versatile, especially if you're being almost any sexy female version of something - witch, fairy, pirate, vampiress, etc. It was just a huge pain in the butt to cut all the little pieces of tape so I'm  glad I got this one done on a weekend, it took longer than my normal manis.

I borrowed my Mom's camera for these photos but I don't think I'm a fan, I'll try to get some different pictures with my own later on during the week when the sun comes back out.

Part 3 will obviously by Winifred Sanderson - but that won't be coming until Wednesday or Thursday. See you then!

Tuesday, October 16, 2012

Halloween Stripe Madness

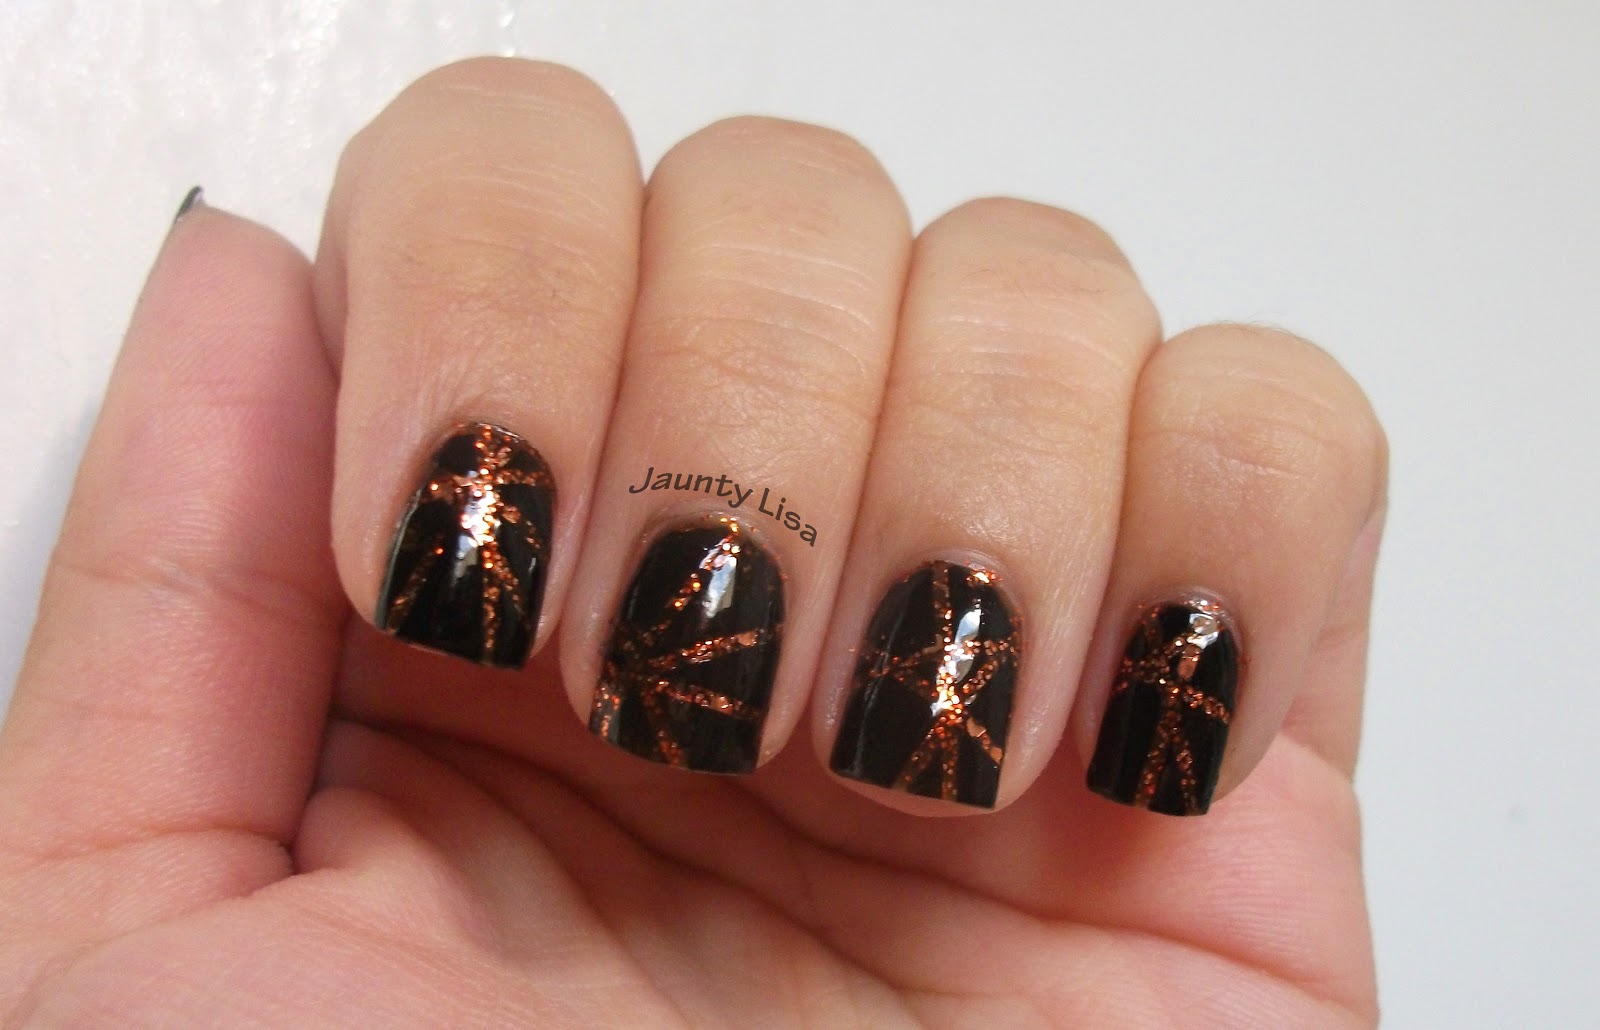
I just got my order of striping tape in the mail today and luckily enough I was already wearing glitter polish. I wanted my first slim striped manicure to be a sparkly one so it was super easy to just throw some black on top of my current nails.

I didn't want to do anything symmetrical or the same pattern, I wanted to go wild with it.


Glitter: Sally Hansen Pumpkin Spice, Love & Beauty Rust.


Black is by Rimmel London, Black Satin.

Okay so there's a few things I didn't like about this. First of all, the striping tape is VERY thin and flimsy. That would be great if I was keeping it on the nail but it was difficult to work with. Secondly, the base of Pumpkin Spice  is a very dark brown so it makes the lines contrast less with the black coat on top. Thirdly, my black nail polish is not very opaque. I'm going to have to pick up a new bottle of WnW Black Creme, I need a one coater.

Oh, another thing, it was MESSY. I didn't cut the strips long enough so when I was removing them I got my fingers covered in polish -_-.


Sigh, what a mess.


Another thing I found tricky with this, it was super hard to photograph! I'm assuming it's because the lines weren't crisp because of the glittery base. Any feed back on that, photog people?

So all in all was the mess and effort worth it??

Wooo, striping tape! $6 for ten rolls on ebay.

Stay tuned over the next 2 weeks for a 3-part Halloween series I'm working on!